Alpha Decay: Why Your Trading Strategy Stops Working
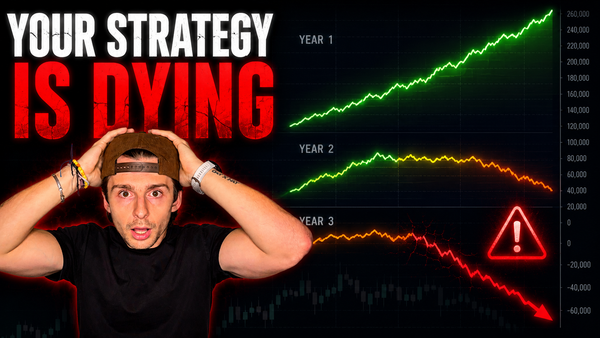
Alpha decay is why your trading strategy stops working over time. Learn what causes it, how to spot it early, and why most guru strategies a scam
Alpha decay is why your trading strategy stops working over time. Learn what causes it, how to spot it early, and why most guru strategies a scam
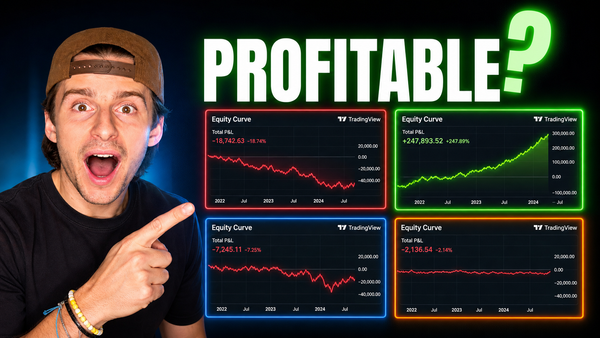
I gave ChatGPT, Claude, Gemini, and Grok the same prompt to build a Pine Script strategy. Here's which one actually made money in the backtest.
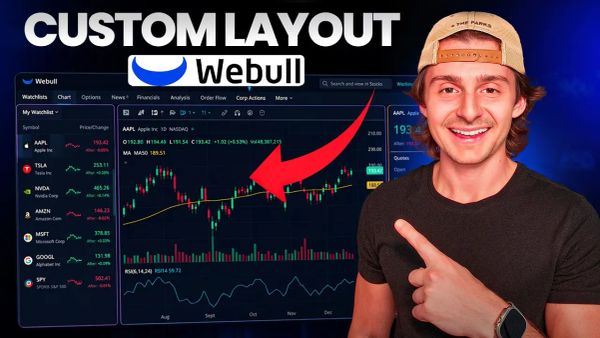
A step-by-step 2026 walkthrough on building a fully customized Webull desktop layout — charts, watchlists, news, order entry, and more.

Learn how to use the Webull Script Editor to build custom indicators for free (no coding required). Step-by-step tutorial with EMA and RSI examples.

Learn how to use Claude AI to write Pine Script trading strategies, backtest them on TradingView, and automate trade execution.
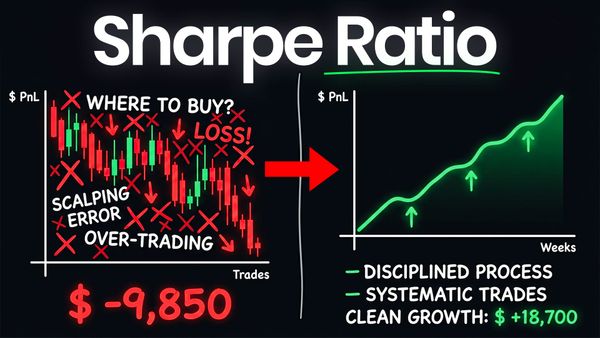
Learn what the Sharpe Ratio is, how to find it in TradingView, and why it's the key to evaluating any trading strategy.
Learn how to create an automated trading bot from scratch using TradingView alerts, backtesting, webhooks, and broker automation.
Discover 3 hidden TradingView features that can help you find strategies, backtest ideas, export trade data, and automate your trading workflow.
Robinhood recently expanded its platform by introducing futures trading inside Robinhood Legend, their advanced trading interface. If you're familiar with trading stocks on Robinhood but have never traded futures before, the platform can feel a bit confusing at first. In this guide, we’ll walk through how futures
If you want to consistently invest or add funds to your brokerage account without manually transferring money every time, Webull allows you to set up recurring deposits directly inside the platform. This feature automatically transfers money from your bank account into your Webull account on a schedule you choose — making
If you’re serious about becoming a profitable trader, your problem probably isn’t strategy. It’s feedback. Most traders don’t lose because they lack indicators — they lose because they don’t track what’s actually working. That’s where a proper trading journal comes in. Over the past
If you're using the new Interactive Brokers Desktop App, one of the best things you can do is build a layout that actually fits your trading style. The default layout works — but customizing it makes a huge difference in speed, clarity, and execution. In this guide, I’ll